Curse You, Randy

The last time you saw our DIY project (courtesy of Shanty 2 Chic), we had spent one day building this little guy:


But what you can't see directly to the right of that picture is this:

AKA a whole bed frame still waiting to be built.

On Sunday we began the construction, which started with the rectangle frame. To hit the angles we used the same come-in-at-an-angle-with-a-screw-and-hope-it-works technique that we used for the headboard legs. You can tell we are experts.


One thing we did do differently, however, was use a flat boring bit to make a pilot hole. This served two purposes. First it allowed us to maximize the length of the screw by making it go in the wood as far as possible. Second, when done correctly, the hole served to hide any unsightly screws that otherwise would have shown.


Emphasis on 'when done correctly.' Ignore the terrible screws in the back.

Essentially the frame construction was a lot of measuring

And a lot of drilling


But this is where my chronological photo taking breaks down, because we ran into some problems. A lot of problems. Basically chaos ensued.

Remember amazing Randy at Home Depot who cut all of our wood for free? Yea, he is still amazing, but some of the pieces were the wrong length and we had no saw to fix it ourselves.

So there we were, at 10pm, with ONE LAST PIECE we had to attach. This is when I entered college senior mode and started flailing around the room talking about how this is like a job interview question where you have a problem and are given only a set amount of resources and you have to figure out what to do.

Don't have any idea what I'm talking about? Let me break it down for you.

Man do I need a job.

In case you can't read that weird infograph born out of my delirious job hunting state, the inevitable solution was to drill as many holes as we could in a straight line across the wood. We then hammered the end piece off and sanded the edges.

Here is a photo of the process after the hammering and before the sandpapering.


It ain't pretty but it got the job done. I totally would have been hired. Maybe.

After screwing in that last piece we did a happy dance and went to lay down the planks and...

.....
.....
.....

they didn't fit either. Curse you, Randy.

Rather than do the effective but time consuming drilling-and-hammering process with all 14 planks, we decided to wait until the next day when we could pick up a small saw from the local handy man store.

Once we had the $6 saw in hand, we did a more streamlined process of the drill-and-hammer technique which was drill a hole in the middle of each plank and saw through that. It really cut down on the manual labor needed.


After cutting the planks to the right size and laying them down, finally finally FINALLY everything was in place.


And we had a bed frame! And a huge pile of sawdust.

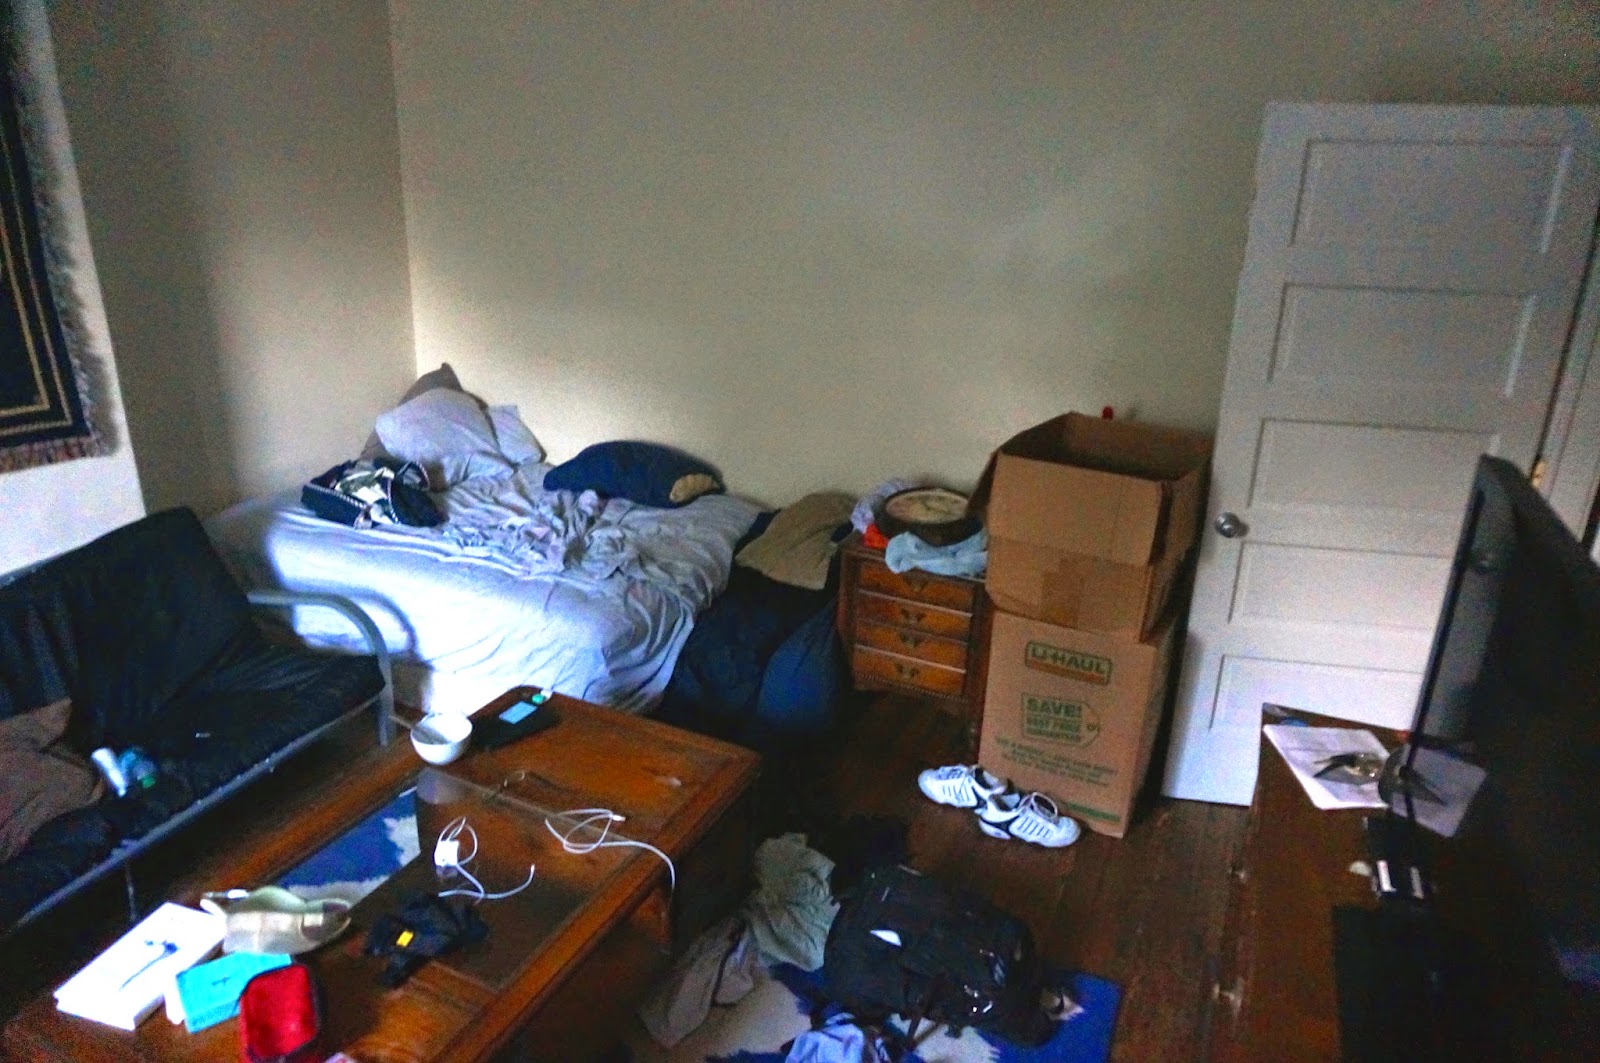
After a 3 day weekend and a lot of labor, Austin's bed nook went from looking like this:


To this:


But we weren't quite done with his room yet. After stalking Craigslist listings for almost 3 weeks, we finally found the perfect couch for the small wall next to his bed.


It was only $100, includes a pull out bed, AND miraculously fit into the back of Frank.

So to wrap up this extremely long post, I will leave you with before and after pics of Austin's Labor Day weekend room transformation.


Not bad, eh?

Laboring on Labor Day


What’s the best place to be on a Friday night in Nashville? Home Depot, of course!


Okay, maybe that was a bit of a hyperbole. But that’s where Austin and I found ourselves the Friday of Labor Day after deciding to build Austin a bed frame for his room.

But let’s step back a little.


This is what Austin’s room looked like for the first 3 weeks of school. And the mattress directly on the floor? Yea that’s how Austin has lived for half of his college career.

So I won’t say that the bed frame idea was entirely my idea but….it was entirely my idea.

At first we were just looking around Craiglist for a cheap one, but when I stumbled across this bed frame design on the DIY blog Shanty-to-Chic, Austin gave the stamp of approval and we decided to dive right in and build it. The owner of the blog writes detailed building plans and tutorials so we thought that it would be a fun and (relatively) easy project to take on.


So that’s how we ended up here on a Friday night:


As first timers to the lumber section of Home Depot, our list of required materials was more than intimidating. Nonetheless, we jumped right in and spent a good hour running up and down the aisles looking for 2 x 8 x 8s, figuring out what to do when they didn’t have 1 x 3 x 10s, and googling the difference between pressure-treated and non pressurized wood (don’t worry Mom, we went with non pressurized - yay no chemicals!)


The employees at Home Depot were some of the nicest people I have ever met. I feel confident making that statement because I’m pretty sure that we asked every person in that place for help at one point or another.

Because we didn’t have the equipment to make large cuts at home, we took full advantage of Home Depot’s cutting station. This meant that we (okay I) also spent a good time on the floor of Home Depot measuring and drawing lines where each piece should be cut.


And as more proof of the awesomeness of the Nashville Home Depot employees, Randy cut every single piece for us without the typical 75 cent per piece charge. Thanks Randy! That saved us a good $50.

In total we spent 2 and a half hours in Home Depot, and really only left because by that point it was 10:30 PM - aka closing time. Don’t worry, we would be back within 24 hours.

Here’s our haul of the night.


And here’s Frank being a tank.


On Saturday we began building the headboard. At Home Depot we had picked out 4 different kinds of Minwax wood stains: Cherry, Early American, Dark Walnut, and Red Chestnut.


The first thing to do for the headboard was decide the pattern of colors we wanted and start to stain the wood pieces. We braved the humidity and mosquitos and set up a work station on Austin’s front porch.


To stain each piece of wood we first sanded them down


Then dusted them off with a cloth


And painted the stain on with another cloth.


We decided to use cloth instead of a paintbrush to avoid any lines on the wood and make it look as natural as possible.

To make sure the colors were coming out the way we wanted them to, we laid each piece out on the headboard as we went.


And here it is almost done….


….except for the three pieces we forgot to get at Home Depot (see empty top row). So back we went for our 2nd out of 3 trips to the store that weekend.

Once all the pieces were stained and in place, it was time to glue each piece down using wood glue.


Human clamp optional.

Once the glue had dried enough to flip the board over, we drilled 1 inch screws into the back to ensure that the boards stayed in place long term.


After that it was time to attach the legs. First we stained them the darkest wood stain we had (Dark Walnut) using the same process as the smaller boards.

Because we didn’t have a pocket screw jig, we had to improvise and just screw the backboard to the legs by using 2 inch screws that came in at an angle.


Luckily it worked out and the legs came out sturdy and stable. The only thing left to do was attach the trim pieces and…..


Voila! We had a headboard!


And it fits perfectly! Huzzah for math and measurements!

I still can’t believe that we were able to finish the headboard all in one day. As the first large DIY project I have ever done it was remarkably easy.

Alas, our good luck did not last long and the bed frame was not as fluid of a process as the headboard.

Look out for that post and the full bed reveal later this week!

The War of the Flies

Would you pay $20 to see a giant hole in the ground?

That was the decision Austin and I found ourselves facing early on Day 4, after making an impromptu 5-mile detour to follow the signs advertising “Meteor Crater - the best preserved meteorite crater on Earth!”


The decision? Austin would take one for the team and sit out in the car while I climbed a million steps to see what the hype was all about. Still questioning whether it was actually me that took one for the team, but I’ll give it to him anyway. Regardless, Meteor Crater was actually pretty impressive. At one mile across and 500 ft deep, you can’t help but be glad that you weren’t in Arizona 50,000 years ago.


After my 20 minutes spent at the Crater (10 min of which were spent in line at their Subway) we headed off to our destination - Albuquerque, New Mexico. Albuquerque is a quirky town (see what I did there?) with gorgeous Spanish style architecture. Unfortunately our time there was mostly spent eating (shout out to The Artichoke Cafe), sleeping, and trying to fit Frank into small parking spaces. Still, we managed to sneak some time in the morning to walk around the Historic Old Town Plaza.


By Day 5 we were Pros at the road. During trip planning, the goal of Day 5 had been to get as far as possible in Oklahoma. Instead we buckled down and made it all the way from New Mexico to Arkansas - a whopping 4 states in one day. Needless to say, Route 66 and us were one.


Despite the distance traveled, we also managed to sneak in two fun pit stops along the way. The first was the ever classic Cadillac Ranch right off of I-40 in Texas.


I’m pretty sure Austin completely forgot about my existence for the 20 minutes that he spent running around trying to find a spray can with paint still in it. I only forgive him because he deals with that exact same thing every time I see a dog. Eventually he discovered one that had probably a teaspoon of paint left in it. I have never seen him happier.


The second “pit-stop” was the even more classic Lucille’s Service Station. Lucille’s is one of only two upper-story, out-thrust porch style stations left on Route 66.


Frank felt very old-fashioned.

We made it to Arkansas by midnight and hunkered down in a Comfort Inn in the town of Van Buren. This was especially fitting given my descendance from the one and only Martin Van Buren.

See any resemblance?


By Day 6 we were dying to be in Nashville, so instead of stopping as planned in Little Rock we headed straight for Tennessee, making it back to school a whole 24 hours faster than we originally planned.


In total the trip took us 6 days, 6 states, and 2700 miles.

It was such a fun way to see the country and add 3 more states to my visited list. Shout out to Oklahoma for having the cheapest gas at $3.05 per gallon, and to my parents for paying for all of it! You guys are the best.

Now that Frank has finally made it to Nashville, he will be spending a lot more time exploring the great state of Tennessee. Stay tuned for more adventures to come!